Meteo Data Logger FTP Integration Setup Guide
Meteo Data Logger FTP Integration Setup Guide
STEM supports the ability for Meteo data loggers to push data to he PowerTrack platform via FTP without relying on any additional data loggers on site. This document outlines the setup procedure necessary to get a Meteo logger device uploading to STEM servers to allow for devices to be monitored in PowerTrack.
- Each site uses a unique set of credentials for FTP uploads. Multiple Meteo loggers on the same site can use the same set of credentials, but FTP credentials should not be shared between different sites, as the STEM data ingest recognizes different sites based on the unique credentials used for the uploads. You should receive FTP credentials for each site that you are configuring from an Stem representative. You will need these when you begin configuring your Meteo device.
- Open a web browser and connect to the Meteo logger via the local network or remotely by entering in its IP address (or the modem's IP and port forward if connecting remotely.) If on the same local network as the Meteo logger, you may be able to log into its web interface by connecting to http://blue-xnnnnnnnn instead, where the 'n' characters are replaced by the last 8 digits of the device's serial number. Upon successful connection, should be greeted by a login page that looks like this:
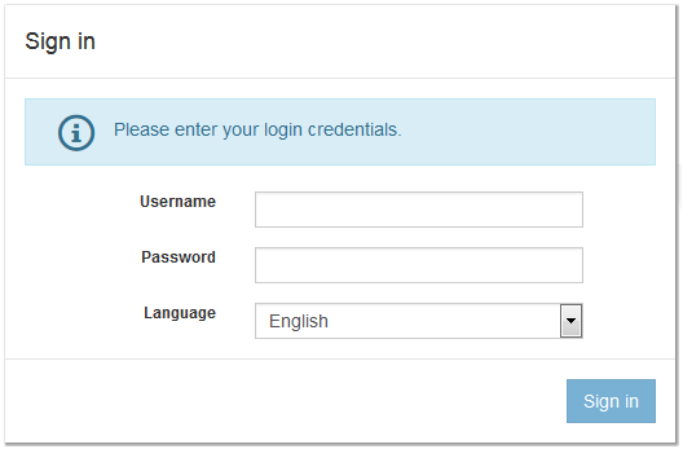
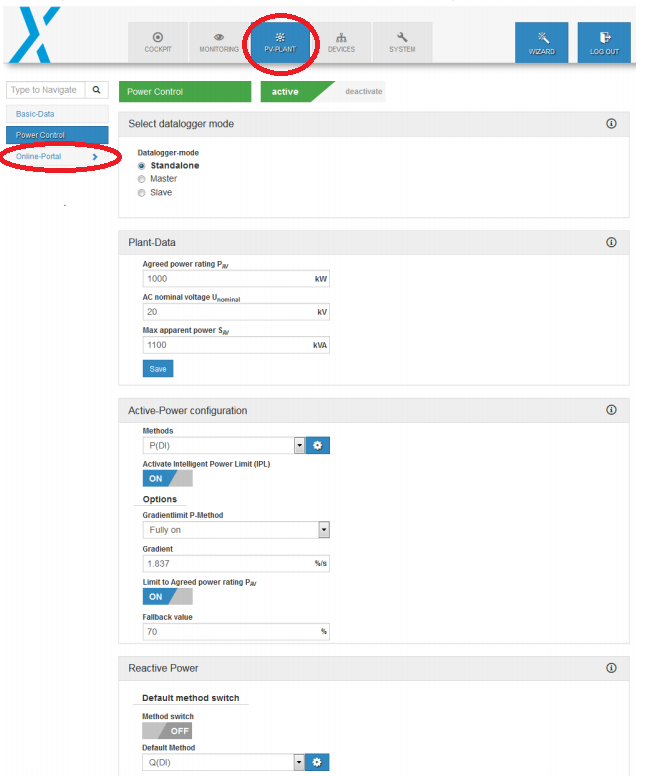
By default, the Username and Password are both set to either "service" or "admin" for Meteo loggers. - Once logged in, click on the "PV PLANT" tab along the top navigation bar, then click on the "Online Portal" menu along the left hand side of the UI to access the FTP-Push configuration page.
- Configure the FTP-Push using the following settings. Please note that the FTP-Server field will differ depending on which instance of PowerTrack (North America / Europe / etc.) the site is hosted on.
- Push-Service: ON
- FTP-Server (Europe): meteoftp.alsoenergy.eu
- FTP-Server (North America): aedataftp.alsoenergy.com
- FTP-Port: 21
- Upload Directory: <Serial Number of the Meteo logger>
- Username: (Provided by Stem, and should include your PowerTrack site ID)
- Password: (Provided by Stem )
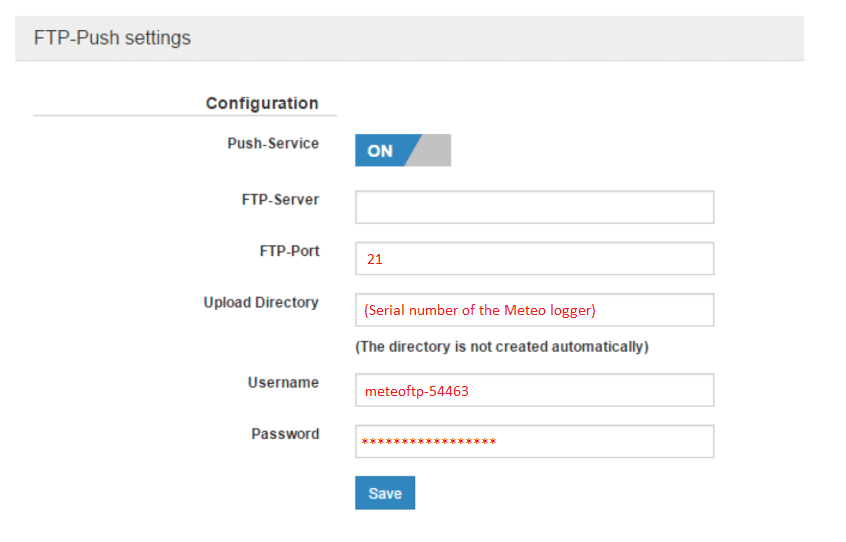 Once you have correctly configured the FTP-Push settings, click the "Save" button.
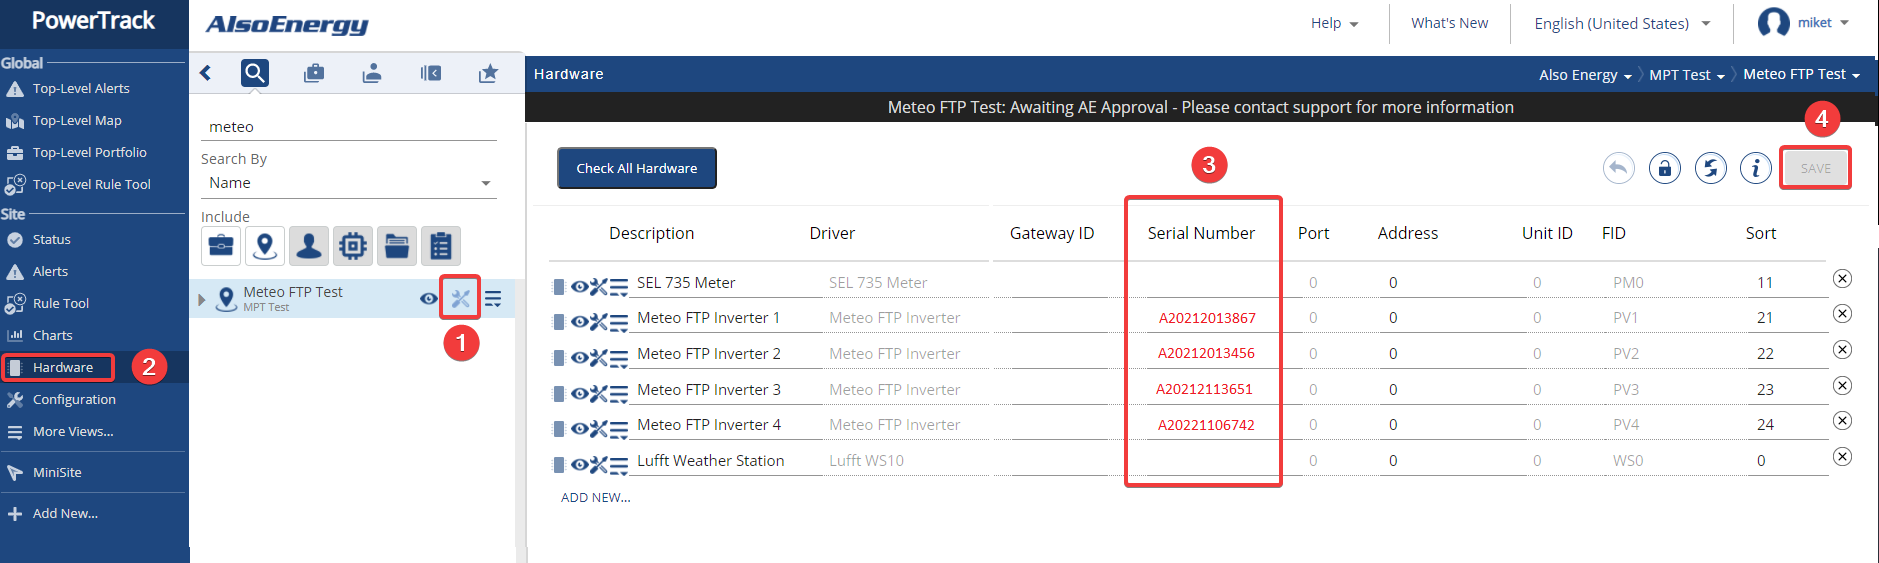
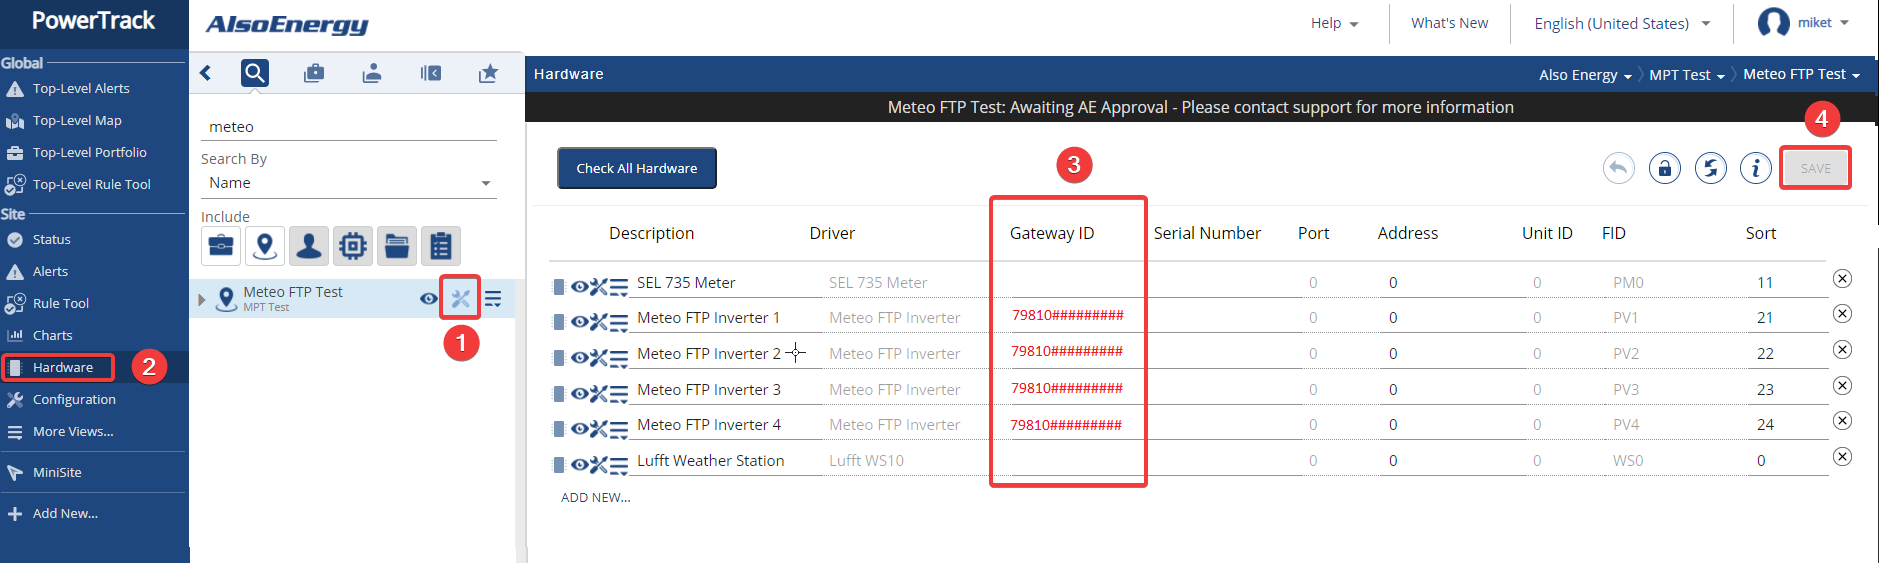
- In PowerTrack, you will need to add the logger's serial number as the Gateway ID for each device that you wish to populate data for. Log in at apps.alsoenergy.com or apps.alsoenergy.eu , and navigate to the site that you are configuring.
- Click the Wrench + Screwdriver configure icon to open the Site Configuration page.
- Click the Hardware tab on the navigation menu on the left side.
- Enter in the Meteo logger's serial number in the Gateway ID column for each device that it is monitoring.
- Click the "Save" button in the top right corner to commit your changes to the PowerTrack configuration.
-
If you are having difficulty finding the serial numbers for your logger, you can find them within the logger's web interface by navigating to PV Plant > Master Data, or System > Logger Data and it should be visible under Serial Number.
-
Meteo logger Serial Numbers are typically numerical, and of the form 79810XXXXXXXXX .
-
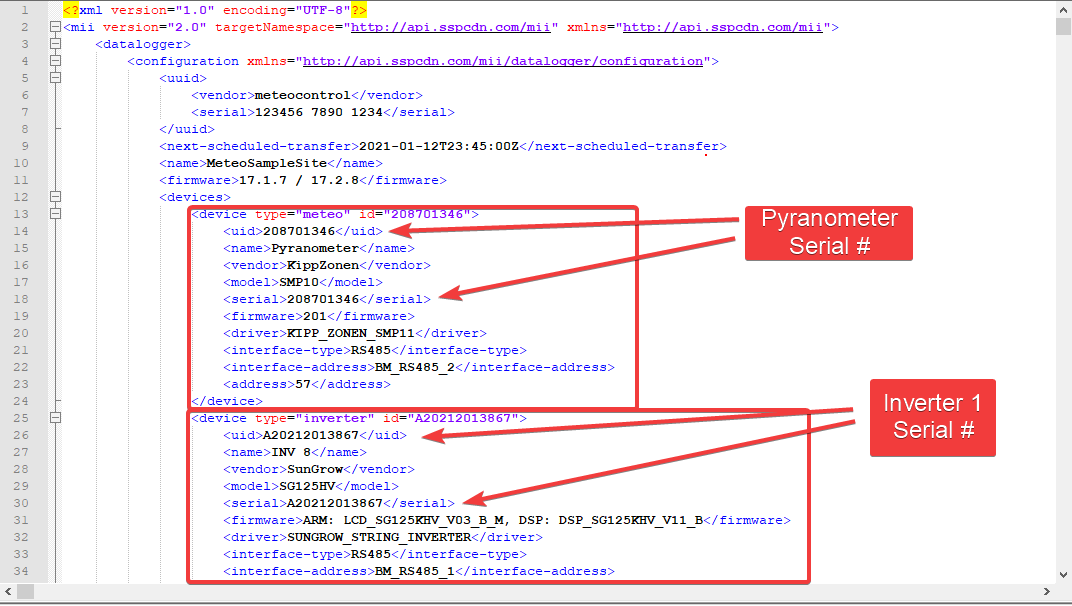
- In PowerTrack, you will also need to add the serial number for each unique device to the Serial Number field for every piece of hardware that the Meteo logger will be monitoring. These serial numbers can be found within the XML files that the Meteo logger uploads, and are denoted by the <uid> or <serial> attribute for each <device>.
ex:
- As with step 5, navigate to the hardware page in PowerTrack by clicking the Wrench + Screwdriver, then selecting "Hardware" from the menu bar on the left side.
- For each device, find the entry in the Meteo Logger XML file, and copy the value of the <uid> or <serial> field into PowerTrack in the Serial Number column.